Tampilkan postingan dengan label 4x4 S10 Blazer. Tampilkan semua postingan

Kamis, 22 Mei 2014

Solid-Axle Swapping - A 1996 Chevy S10 Blazer

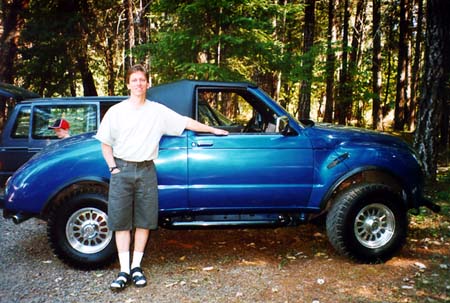
Micro Machines Monster Truck

We think Mike Gold's brother said it best when he came through the doors of Revolution Vehicle Dynamics, looked at our S-10 Blazer, and said, "That looks like a Micro Machines monster truck!" With 35-inch Baja Claws sitting under it, our little Chevy certainly was looking tough.
We decided to make some drastic changes to our '96 S-10 Blazer last month. The IFS suspension parts had worn out, the brakes were shot, the steering was all over the place, and the Almighty Dime had basically been parked until we could do something.
That “something” ended up being a solid-axle swap for our mini Blazer. While it would have been nice to keep the 4WD independent front suspension and done some type of long-travel kit, we're not aware of any kits currently available, and the cost of fabricating one would be more than our S-10 is worth (which is no excuse: We often buy parts worth more than our trucks). A few people suggested getting rid of the 4WD and putting a 2WD long-travel kit on, but losing such an advantageous thing like four-wheel drive seems unreasonable to us. Our Almighty Dime sees more than just desert, and while it may not be able to go quite as fast off road (with a solid axle), a four-wheel-drive solid-axle setup will allow us to do everything we want to do while not being too expensive to boot.
We did some research, gathered some Wagoneer Dana 44 axles, Wagoneer front springs, a Sky's Offroad Design SAS (solid-axle swap) hanger kit, and a few other incidentals we needed to make this all work smoothly. Mike Gold at Revolution Vehicle Dynamics in Apple Valley, California, assembled the pieces, built a steering draglink to connect to the Wagoneer axle's tie rod, and bolted some Rancho Pro Series shocks and Mickey Thompson 35-inch Baja Claws onto the Almighty Dime. Our mini Blazer was ready for an initial shakedown run that ended shortly after realizing how much it wandered.
While the project was moving under its own power, there was (is) definitely still work to do.
Our two real problems were front suspension wandering and front-wheel drive.
After the first run, there was no question that the SUV needed a front track bar. Mike fabbed one up and we went back out for another round of testing, only to tweak the stock front Wagoneer leaf springs. This left our S-10 sitting low in front and slightly angled to one side. After we add some new Rancho 44044 Wagoneer front springs, the front should be back up to the correct height.
As for the front-wheel drive issue: We ran into a problem we weren't expecting with the long slip-yoke (not fixed) output shaft on the front of the S-10's NP233C transfer case. None of our local driveshaft shops could make us a front driveshaft that would work for our solid-axle swap. The first option we thought of was to swap the T-case. There are adapters available to put a few different transfer cases in back of our S-10's 4L60-E transmission, but our recently rebuilt NP233C is electronically shifted via a dash knob and already in the truck. Keeping the stock transfer case is definitely going to be the easiest route, if possible. A little more S-10 T-case research revealed that there are many similarities between the NP233C found in S-10s and the NP231J transfer case found in Cherokees. Other S-10 owners have had success swapping a front output from a Cherokee T-case into the NP233C, so we're in the process of tracking down a donor NP231J now.
It is close to done, but the Almighty Dime project is not quite finished. It's reached a point where it is stable at 65 mph and can handle prerunning duties with almost no tire rub. But some better bumpstops, lower gears, and most importantly four-wheel drive would complete our Almighty Dime.

Step By Step

View Photo Gallery
  • 1. Our S-10’s solid-axle swap revolves around 1980-and-later Jeep Wagoneer Dana 44 axles. Using them would give us an axle strength upgrade, a brake upgrade, and a suspension that was better suited for off-road use.
  • 2. We used a Sky’s Offroad spring hanger kit to get the front Wagoneer axle on. Mike Gold of Revolution Vehicle Dynamics built a rod end draglink to connect to the stock tie rod of the front Dana 44 Wagoneer axle. He reused the original pitman arm on the steering box by modifying it to accept a rod end.
  • 3. Since the Wagoneers had all-wheel-drive setups, there were no locking hubs on the front axle we swapped. We added a set of stainless-steel Mile Marker lockout hubs to the Dana 44 to give us 2WD/4WD capability.
  • 3. Since the Wagoneers had all-wheel-drive setups, there were no locking hubs on the front axle we swapped. We added a set of stainless-steel Mile Marker lockout hubs to the Dana 44 to give us 2WD/4WD capability.
  • 4. To get the rear axle driven by the transfer case, all we had to purchase was a conversion U-joint to get from the original S-10 driveshaft to the swapped-in Dana 44 rear axle. We’ll have to change the driveshaft completely if we decide to do a fixed-yoke kit in the rear of our NP233C transfer case (recommended).
  • 5. The front output shaft of our S-10’s NP233C transfer case was causing an issue. The solution is to swap in a front output shaft and yoke from a NP231J Cherokee T-case into our NP233C. As soon as we find a donor NP231J ’case, we’ll get four-wheel drive back.
  • 6. Luckily, the Wagoneer axle’s shock mounts lined up in the rear (with the frame mounts) and we easily lined up the fronts since we used Sky’s weld-on Toyota shock hoops. But at ride height, our front 12-inch-stroke Rancho shocks had only a few inches of compression travel. While it was at Revolution Vehicle Dynamics, Mike figured out a solution. He realized he could cut off the front axle’s original shock tabs off the housing and reverse the U-bolt plates from left to right. The Wagoneer U-bolt plates have single-shear studs coming off of them for sway bar link mounts in front of the axle. By turning the U-bolt plates around, Mike effectively made a new lower shock mount that gave us about 2.5 inches more compression travel. While a single shear mount is not ideal, we believe it will be strong enough for this application.
  • 6. Luckily, the Wagoneer axle’s shock mounts lined up in the rear (with the frame mounts) and we easily lined up the fronts since we used Sky’s weld-on Toyota shock hoops. But at ride height, our front 12-inch-stroke Rancho shocks had only a few inches of compression travel. While it was at Revolution Vehicle Dynamics, Mike figured out a solution. He realized he could cut off the front axle’s original shock tabs off the housing and reverse the U-bolt plates from left to right. The Wagoneer U-bolt plates have single-shear studs coming off of them for sway bar link mounts in front of the axle. By turning the U-bolt plates around, Mike effectively made a new lower shock mount that gave us about 2.5 inches more compression travel. While a single shear mount is not ideal, we believe it will be strong enough for this application.
  • 6. Luckily, the Wagoneer axle’s shock mounts lined up in the rear (with the frame mounts) and we easily lined up the fronts since we used Sky’s weld-on Toyota shock hoops. But at ride height, our front 12-inch-stroke Rancho shocks had only a few inches of compression travel. While it was at Revolution Vehicle Dynamics, Mike figured out a solution. He realized he could cut off the front axle’s original shock tabs off the housing and reverse the U-bolt plates from left to right. The Wagoneer U-bolt plates have single-shear studs coming off of them for sway bar link mounts in front of the axle. By turning the U-bolt plates around, Mike effectively made a new lower shock mount that gave us about 2.5 inches more compression travel. While a single shear mount is not ideal, we believe it will be strong enough for this application.
  • 7. After taking its initial shakedown run, the Wagoneer front axle proved to wander too much and was pushed side to side by the steering system. Wagoneers used track bars straight from the factory for this very reason, so our front axle already had a track bar bracket. Mike fabbed up a track bar bracket on the frame and a rod end track bar to match, keeping it parallel with the steering draglink.
  • 8. The rear had no issues. We used Sky’s S-10 shackles, the stock S-10 leaf springs, and welded new spring pads to the axle. The upper and lower shock tabs even lined up. With the lift shackles, the stock leaf springs, and the spring-under axle, we were able to put on 315/75R16 (35-inch) Mickey Thompson Baja Claws on Classic III aluminum wheels.
  • 9. Wagoneers came with 15-inch wheels, which typically have a higher offset than a 16-inch wheel does. When we went to put on our new 16-inch Classic III wheels, we didn’t get more than a few feet out of the work bay before having to stop for a rubbing noise. The tie rod ends were actually rubbing the 16-inch wheels. We would have gone with a 15-inch wheel, but tires for 15-inch wheels are getting harder to find and 16s opened up tire selection for us.
  • 10a. Four G2 Axle & Gear billet wheel spacers solved the issue for us. Not only did it allow clearance of the tie rod ends and wheels, but it also allowed us to clear the front leaf springs at full steering lock. The added 1.25 inches of width to each side brought our track width back to about that of a factory Wagoneer.
  • 10b. Four G2 Axle & Gear billet wheel spacers solved the issue for us. Not only did it allow clearance of the tie rod ends and wheels, but it also allowed us to clear the front leaf springs at full steering lock. The added 1.25 inches of width to each side brought our track width back to about that of a factory Wagoneer.
  • 11. While we had no front-wheel drive yet, we did make it around as best we could in rear-wheel only. We were definitely impressed with how far the Mickey Thompson Baja Claw radials took us in 2WD.


From: http://www.fourwheeler.com/how-to/transmission-drivetrain/1310-solid-axle-swapping-a-1996-chevy-s10-blazer-the-almighty-dime-part-2/

The Rodster - 4X4 1989 S10 Blazer

"The Rodster® is a kit car based on the Chevy S10 donor platform.  The car you see here is the first Rodster® built on a lifted 4X4 S10 Blazer."


"The Rodster® is a superbly designed and engineered kit that is probably the most practical and economical specialty car around.
I put the kit together in just 2 months, working evenings and weekends. Everything went together and fit perfectly. The quality of the fiberglass was excellent. The S-10 Blazer is a perfect donor vehicle: I used an '89 with a fuel-injected 4.3L V6, A/C, power everything, tilt wheel and cruise control. I added a 3' lift kit, 31X10.5R15LT tires, fender flares, exterior hood latches, tube bumpers and nerf bars, and a tow hitch, which makes it the ultimate cruising SUV.
With the hard top, I can drive it every day and I do. Why wouldn't I?
Doing business with Rodster®, Inc. was a pleasure. They worked with me on special requests and I got all my parts on time. I was also able to call when I had specific questions about the buildup.
My 4X4 Rodster® is great! Pardon my enthusiasm, but it's hard to not be excited when all I have to do is drive it or park it or whatever and I get tons of positive comments and questions."
Kraig Short
Hillsboro, Oregon
Note: This article originally appeared in Tach'n Opinion, the monthly newsletter for the Oregon Handcrafted Automobile Association (OHAA).
I noticed that last month's newsletter was a little thin. Al can't do everything by himself, so I thought I might write a little about my recent car project. I've built two cars in two years now so I guess that qualifies me as a kit car enthusiast. Actually, I think the bug bit me pretty hard. Those of you who have built your own cars understand the gratification that comes from our hobby. It's been said that some people are builders and some are drivers. I think I'm a builder. No sooner do I complete one project than I feel I need to start another one. At any rate, here are some of the details of my Rodster® project.
I've always loved 4x4's and have owned several Jeeps, a Toyota pickup, and a Nissan Patrol. After I built my '29 Mercedes replica, I began to wonder why not more kits were offered on a 4x4 donor platform. I even considered how cool it would be if someone designed an off-road kit resembling the Hummer. Well, I guess I wasn't the only one with that idea. Anyway, I was just about ready to plunk down some cash for a Jeep Wrangler when I saw the Rodster® featured in one of the magazines. I noticed it was designed for the S10 Blazer, specifically for the 2WD version. I thought, 'The Blazer is a four-wheel drive vehicle, isn't it? I wonder what that kit would look like on a 4x4 with a lift kit and big tires?' Well, the idea was born and it took hold in me with a vengeance.
There are five basic, if oversimplified, steps to building a Rodster ®:
  1. Obtain donor.
  2. Cut it up.
  3. Obtain Kit
  4. Attach Kit Parts to donor.
  5. Paint.
However, if you figure in a few mistakes along the way, and a few modifications to make the kit work on a 4x4, I think the actual number of steps is somewhere around 4,383.
 
Step 1: Obtain Donor.
I thought about the Rodster® kit for months before I did anything about it. I told myself (actually, my wife told me) that I didn't have the money or the time to start another project. Not to mention that half of my garage was already occupied by a newly finished car and my wife used the other half for parking the minivan. Undaunted, I scoured the papers for a suitable Blazer donor vehicle. After all, even if I didn't build a Rodster,® I could still use a Blazer, right?
The Oregonian advertised that a particular 1989 S10 Blazer 4x4 could be had for 3000 something with a slipping transmission. I decided to check it out. The transmission didn't seem bad at all. Maybe it just needed fluid. I offered $2700. SOLD! The next day the puddles on the garage floor revealed that it needed fluid all right. But no matter how much I put in, it still ended up on the garage floor, and the transmission slipped regardless.
My Blazer had some redeeming qualities. It was a 4.3L V6, which I would need to help turn the bigger tires. It was also the Tahoe package, which included A/C, cruise, tilt, power windows and locks, all of which were retained in the finished vehicle. I didn't get to use the two-tone paint, roof rack, and rear window wiper/washer/defroster. Bummer. One nice feature was little dome lights built into the rear view mirror. That comes in handy in an open top vehicle. It also had a cheap-o alarm system that didn't work, which took me a couple of hours to cut out of there. The Pioneer detachable face CD player is pretty nice, I imagine, but I don't know because it came with the face detached. Some previous owner probably thought they'd get back at the dealer for not giving them a good trade-in value. The face costs 80 bucks to replace and it's a crapshoot because you still don't know if the CD player works.
Anyway, the truck spent the winter in the rain slowly losing air from all four of its bald, mismatched tires.
Step 2: Cut it up.
This was the fun part. But before you lay a blade to your nice Blazer donor vehicle, you better make sure that you're getting a Rodster® kit. You may even want to switch steps two and three. I didn't, but hey it might be a good idea anyway. For clarification, your steps would be:
  1. Obtain donor.
  2. Obtain Kit.
  3. Cut it up (er, the donor that is).
  4. Attach Kit Parts to donor.
  5. Paint.
My step 2 was cutting up the donor vehicle. I ordered an assembly manual from Henry Caroselli, who designs and sells the kits. But I wanted to get to know the company more up close and personal, you see, so I planned a visit to his shop in El Segundo, California.
Hmmm, how to justify a trip to Southern California? Hey, isn't Disneyland down there? Aren't we about due for a family vacation? Hey, kids let's go to Disneyland! Yea!!!!! We drove all the way down in December right before Christmas. We saw Disneyland, Knott's Berry Farm, Six Flags, the beach, and of course, the Rodster® factory (which just happens to be pretty close to the beach).
I was impressed with the company, to say the least. It looked like he was cranking out kits at a pretty good clip. Although the fiberglass work is done elsewhere, I was able to see some completed cars, including the Power Tour car. I asked lots of questions. Specifically, I took measurements of the wheel wells on the Rodster®, because I needed to know exactly how much tire I could scrunch under there with a reasonable amount of lift.
I went home and stewed for a couple more months before making the commitment (read coughing up the cash for a down payment). If you have to justify everything you do you're not going to be very happy. I bought it because I wanted it. The whole project was financed by VISA and Home Equity Loan. (My other kit car and my Mazda MX-6 are still for sale, by the way.)
It's time to start cutting. Follow the instructions very carefully. Don't get too carried away. That said, this was a blast. I got the manly tools for the job: sawsall, grinder, hacksaw, pry bar, etc. Lifting the roof off with two hands and tossing it off into the yard was quite a thrill. The pile of parts I removed was as big as a car, and the Blazer really didn't look like one anymore. I sold off a bunch of the extra parts, and I still have a few. If you have questions about the exact location of a cut, wait until you get the kit before you finish it off.
I did a few more things before picking up the kit. I installed Rancho shocks, new spark plugs, wires, fuel filter, K&N filter, and other miscellaneous parts. I installed the 3" body lift, which wasn't nearly as hard as I thought it would be. The tricky part was rigging up the right jack the right way. Also, since my Blazer has the collapsible steering column, I didn't have to make any other major modifications. The shift linkage had to be modified, and the driveshaft tunnel and shift boot needed mods for the floor-mounted 4x4 shifter. I also took the opportunity to drop the tranny and have it rebuilt. The remainder of the 4x4 and performance goodies were on their way from JC Whitney.
Well, I think that's enough for the first installment. Next time you'll see how I got another trip to California and why I had to sleep in the minivan in the front seat that wouldn't recline. Also, we'll start building the Rodster®. Seeya.

Features
Original Car
1989 Chevrolet S10 Blazer 4X4 Tahoe edition.  4.3L V6 with Automatic transmission, A/C, Power Windows, Power Locks, cruise control, tilt wheel, digital gauges.  Car has 165K miles but the engine has been rebuilt.
Mechanical and Performance
3" body lift, 31x10.5R15LT tires on 15" American Racing fully polished alloy wheels, Rancho RS5000 shocks, SUPER chip, K&N filter, new exhaust including 2 1/2" catalytic converter and Flowmaster muffler with 3" chrome tip, 3500lb receiver hitch, newly rebuilt transmission with shift kit and clutch pack, new battery.
Kit Details
Custom 4-row radiator, high capacity electric fan, new A/C condenser, custom front and rear 3" tube bumpers,  3" nerf bars, tilt front hood section with exterior hood latches, front and rear fender flares, removable fiberglass hard top with rear window, vinyl bikini top, custom carpet-covered cockpit-to-trunk wall and speaker enclosure, detachable face CD player with 4 speakers, amp and subwoofer, custom center seat with seatbelt folds down for use as an armrest, Grant signature series steering wheel.
Very fun for cruising, gets 19 mpg.  Built to be driven.  Drove it to California over 1200 miles without any problems.  Driven in city traffic in very hot weather without any problems.  Nice stereo, fully enclosed securable trunk area.  Performance chip and muffler give it a great sound and tire squealing ability.  Gets a lot of looks and comments.

From: http://www.rodster.com/owners/4x4.htm